发表新主题 回复该帖子
主题:[转]struts2 入门基本配置—最简单的struts2环境配置搭建[图文教程]
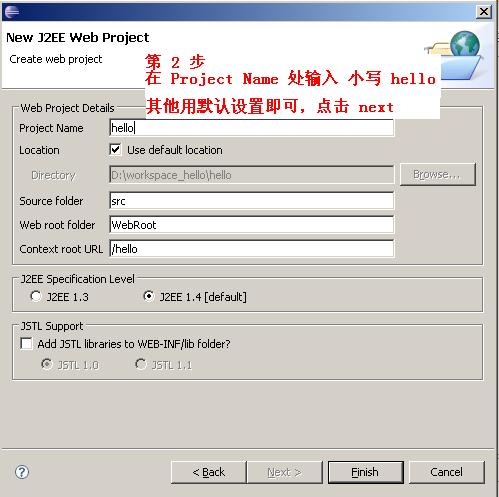
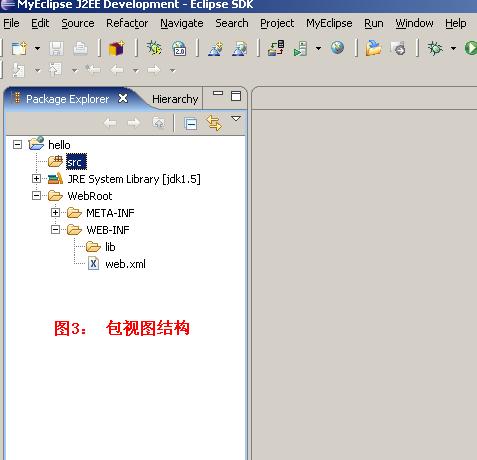
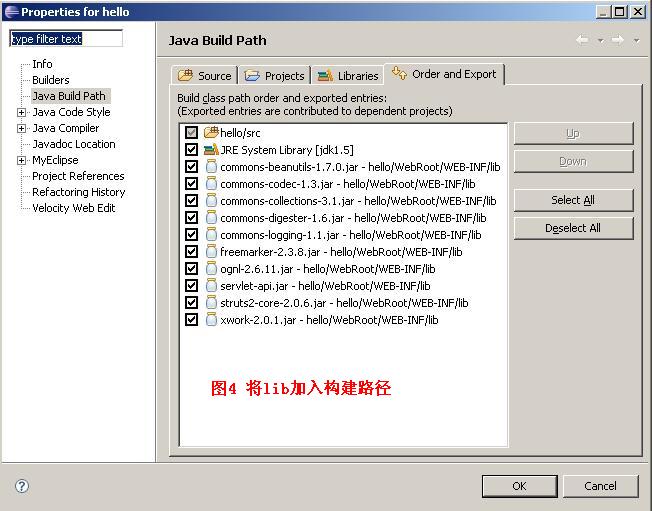
唧唧
帖子档案  楼主 [转]struts2 入门基本配置—最简单的struts2环境配置搭建[图文教程]   Post by : 2009-04-23 12:25:21.0
  • 幼儿园
  • 幼儿园
  • UID:3
  • 主题:342
  • 帖子:781
  • 加为好友 加为好友    发送短信 发送短信

struts2 入门基本配置。
个人认为是最简单的struts2环境配置搭建了,希望能对struts2入门的朋友有所帮助。

开发工具和环境: jdk1.5 + eclipse3.2 + myEclipse5(可选) + tomcat5.5

第一步:建立工程.

选择菜单 File -> new -> Project 在弹出窗口中选择 web project 然后 点击next 。如图1 。
点击在新窗口打开
 

在接下来的窗口中填写项目名称 hello .点击finish 。如图2 。
点击在新窗口打开
 

此时项目的包视图结构如图3
点击在新窗口打开
 

第二步:配置 web.xml

将WEB-INF/web.xml 中的内容改为:

<?xml version="1.0" encoding="UTF-8"?>
<web-app id="WebApp_ID" version="2.4" xmlns="http://java.sun.com/xml/ns/j2ee" xmlns:xsi="http://www.w3.org/2001/XMLSchema-

instance" xsi:schemaLocation="http://java.sun.com/xml/ns/j2ee http://java.sun.com/xml/ns/j2ee/web-app_2_4.xsd">
<display-name>struts2</display-name>

<filter>
<filter-name>hello</filter-name>
<filter-class>org.apache.struts2.dispatcher.FilterDispatcher</filter-class>
</filter>

<filter-mapping>
<filter-name>hello</filter-name>
<url-pattern>/*</url-pattern>
</filter-mapping>
   
<welcome-file-list>
<welcome-file>index.html</welcome-file>
<welcome-file>index.htm</welcome-file>
<welcome-file>index.jsp</welcome-file>
</welcome-file-list>

</web-app>

第三步:导入struts2相关包

将如下jar文件放到WEB-INF/lib 目录中,并在classpath中指定它们,以便项目能找到(图4):

commons-beanutils-1.7.0.jar
commons-codec-1.3.jar
commons-collections-3.1.jar
commons-digester-1.6.jar
commons-logging-1.1.jar
freemarker-2.3.8.jar
ognl-2.6.11.jar
servlet-api.jar
struts2-core-2.0.6.jar
xwork-2.0.1.jar
点击在新窗口打开
 

第四步:建立action

在src下建立一个包(package)名称为action
在action包下建立一个类名称为 HelloAction , HelloAction.java 代码:

package action;

import com.opensymphony.xwork2.ActionSupport;

public class HelloAction extends ActionSupport {

public String execute() throws Exception {
  
   return SUCCESS;
}

}


第五步:配置 struts.xml

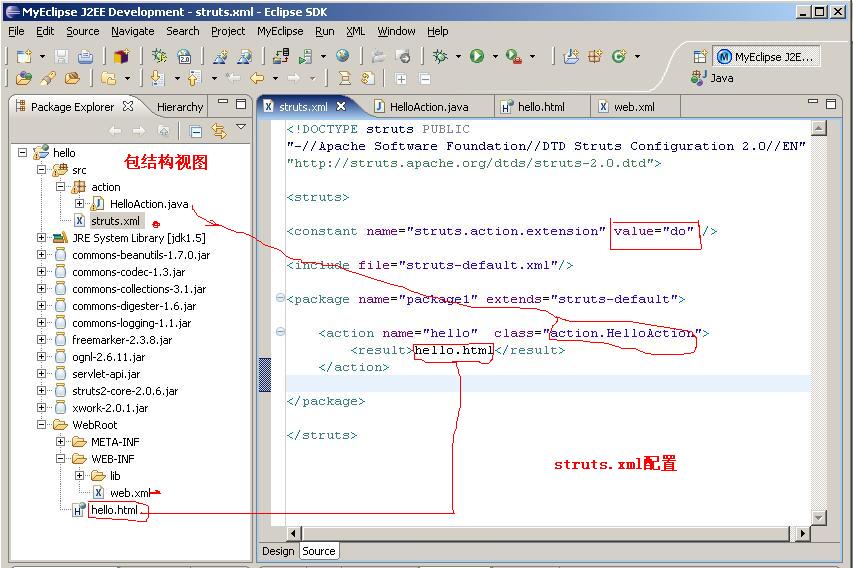
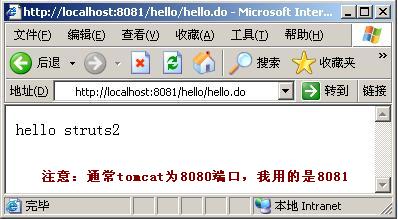
在src根目录下建立 struts.xml文件,内容如下:

<!DOCTYPE struts PUBLIC
"-//Apache Software Foundation//DTD Struts Configuration 2.0//EN"
"http://struts.apache.org/dtds/struts-2.0.dtd">

<struts>
<constant name="struts.action.extension" value="do" />
<include file="struts-default.xml"/>
<package name="package1" extends="struts-default">
<action name="hello" class="action.HelloAction">
   <result>hello.html</result>    
</action>
</package>
</struts>

第六步:建立页面

在WebRoot根目录下建立一个 hello.html 文件,内容只有一行:

<html><body> hello struts2 </body> </html>

第七步:最终包视图结构 如图5:
点击在新窗口打开
 

第八步:编译,发布,测试

发布后,在地址栏中输入 http://localhost:8080/hello/hello.do 进行测试。
如果出现页面上有 hello struts2 就说明成功了。图6:
点击在新窗口打开
 

注意:我测试的tomcat用的是8081端口。你要根据实际情况调整。

签名
 ★★★★★★★★
 纵里寻她千百度,蓦然回首,那人却在,灯火阑珊处!
 MyBlog :http://blog.javawind.net
返回页面顶部  


CopyRight © 2008-2009 JavaWind.Net Studio All Rights Reserved
Powered By JWind.BBS Vesion 1.0.0 Beta1 Processed in 16 ms,0 (Queries)  Gzip enabled

WAP - 清除Cookies - 联系我们 - JavaWind.Net Studio - Archiver - TOP Valid XHTML 1.0 Transitional Valid CSS! 粤ICP备07511478号